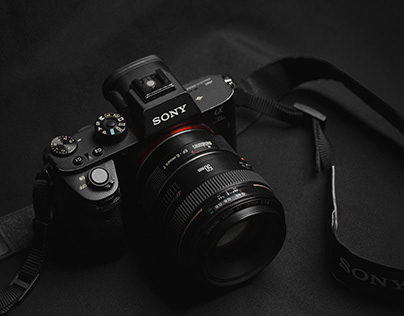
Using a Camera for your Best Photographs!
1. HOLD TO YOUR CAMERA PROPERLY
Use the camera for your best photographs. the first way is we should learn how to hold your camera properly. Every photographer should know how to take better photos. But many new photographers don’t hold their camera properly .it is the important thing or basic lesson of using the camera. Camera settings are fundamental to beginner photographers to help them with their photographic skills.
If don’t hold your camera properly it causes a camera shake and gave blur images. Nowadays all of them prevent this type of problem using tripods.
You should always hold the camera with both hands. Grip the right side of the camera with your right hand and place your left hand beneath the lens to support the weight of the camera.
2. SHOOT IN RAW
We start to shoot in RAW. When you shoot in RAW you’ll not only get higher quality images but you’ll also have far more control in post-processing. shooting in RAW can transform the quality of your images, so if you have the time and space, it’s definitely worth it.
Sometimes referred to as a digital negative, you can think of a RAW file as the raw “ingredients” of a photo that will need to be processed in order to bring out the picture’s full potential. If you’re not sure how to switch from jpeg to RAW, check your camera’s manual for detailed instructions.
3. EXPOSURE TRIANGLE
Next, we should understand the exposure triangle. first, we think this is very difficult, but it is very important. The exposure triangle depends on three important elements.
ISO
1.ISO; is a key setting on the camera.iso increases the light information captured by the camera sensor.
100-3200 in entry-level cameras, and 100-6400 in more advanced cameras.
SHUTTER SPEED
2. SHUTTER SPEED; it is an essential setting to capture motion., this is another fundamental camera setting. Shutter speed controls how long the shutter stays open when you take a picture.
From 30 seconds to 1/4000th of a second depending on the scene
APERTURE
Aperture is the first basic camera setting and most important photography setting. opening in your lens and controls how much light gets through to the sensor of the camera.
f/1.8-f/5.6 in low light or for a narrower depth of field, and f/8-f/16 for a wider DoF
4. FOCUS CAMERA SETTINGS
It is an important camera setting. one of the basic camera settings for taking sharper images. This camera setting can be divided into manual focus mode or autofocus mode depending on the type of photography we do.
FOCUS MODE SETTINGS
Focus mode is the tool to adjust focus once the focus button is pressed.
The two main focus mode camera settings;
Single Autofocus Mode (AF-S/One-shot AF): Using this mode, the camera locks the focus on the subject but if it moves, the camera won’t adjust focus to compensate. It’s the best setting mode for still subjects (and one of the best camera settings for landscape photography)
Continuous Autofocus Mode (AF-C/AI-Servo): Using this mode, once you’ve locked your focus, your camera will try to track the subject when it moves within the frame. It’s the best setting mode for moving subjects, like wildlife, sports, and street photography.
FOCUS AREA SETTINGS
photo settings related to focus areas, these are the main modes to choose:
Single Point Area Mode (single-point AF/Manual AF Point): Using this mode, you can select a single focus point. It’s the best focus area for landscape, still portraits, macro photography, and architecture.
Dynamic Area Mode (Dynamic AF Area/AF Point expansion): Once your focus point is selected, if your subject moves, the camera will use several focus points to track it. It’s the best for wildlife, sports, and street photography.
Auto Area Mode (Auto AF Area/Automatic AF Point selection): The camera automatically decides the focus points to use. It’s the best for scenes where you need to focus on something easy and close to the camera.
There are other good camera settings to learn related to focus areas, like EYE Autofocus, but this will depend on your camera model.
5. CAREFUL WITH YOUR ON-CAMERA FLASH
If you’re not careful, using your camera’s built-in flash at night or in low light can lead to some unpleasant effects like red eyes and harsh shadows. In general, it’s better to crank up the ISO and get noisier photos than to use the on-camera flash and risk ruining the shot altogether.
Sometimes, however, there may simply not be enough light, and if you don’t have off-camera lighting, you’ll be left with no choice but to use the built-in flash. If you find yourself in this situation and don’t want to miss the shot, there are a couple of things you can do. First of all, find the flash settings in your camera’s menu and reduce brightness as much as you can.

